|
|
Post by mikey100 on Jul 17, 2009 22:50:13 GMT 10
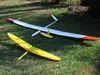
Sean, you better tell chris he needs a mould for the fus. Chris...no, I dont want to build one. Like my Pike. And the $600 or so for the quality servos heeded for a bird like this just isnt in my plan. Am happy to just fly what I got for the time being.  |
|
|
|
Post by sean on Jul 18, 2009 1:17:04 GMT 10
Chris - you need a mould for the fuse . You also need a mould for the tail mount. It would also be quite expensive - lots of kevlar, carbon, epoxy, expensive foam and tools. Plus as Mike says 6 pricey servos etc etc. |
|
|
|
Post by chamm37 on Jul 18, 2009 3:12:36 GMT 10
Yer i have seen the guys make their own plugs and stuff like that. The link i put down as i have found out was of a moulded wing Supra not a bagged one so i will have to find a thread somewhere on how to build one and see how it all goes. The only thing why i chose to do the Supra is because I only really fly F3J and don't do much sloping anymore and I have had a couple of guys say to build a Jart instead of the Supra as a first moldel. I wanna build something for thermaling , mainly F3J. Does anybody have any ideas on a plane that would be best to start from as a first model instead of building a Supra  Regards, Chris |
|
|
|
Post by jirvin4505 on Jul 18, 2009 7:46:16 GMT 10
....... so i will have to find a thread somewhere on how to build one and see how it all goes. ............ Does anybody have any ideas on a plane that would be best to start from as a first model instead of building a Supra Regards, Chris RCgroups is you friend A search on Rcg will give 2-3 significant threads on building a bagged Supra. The techniques cross over into any thermal plane you may want to build. Then if you are really keen to find info you can use Google translator and go through Berrie's threads on rcgroups in .ne. The info is available!!! Of course one of the essential tools... Phil Barnes vac bagging has been mentioned on these groups previously. Chris I think the way has been shown here recently on windsock. You do some research.....get some foam.....do some cutting---- priceless experience ;D ;D If you are having trouble on deciding on a wing for the Prism then may i suggest a MH32 or 7037or RG15 airfoil to the same planform sheeted with veneer or balsa. Not sure what all this means - plenty of wing builds in the Composite, Thermal and Slope section of RCgroups. Do some research to choose a technology suited to you. Really I will say it again - some excellent leadership has been shown here recently on Windsock - a Jart build and the work of Garth and Mike100. You get some foam and starting cutting cores - it is a great reality check. cheers jeff |
|
Garth
> 100
 wings are for wimps
Posts: 188
|
Post by Garth on Jul 18, 2009 8:59:31 GMT 10
Chris you need a plane that you can fly any where and any day of the week as you have no car and you don't have to rely on anyone taking you to places. When i was your age i wanted to fly all the time but i just had to sit it out till i got a car. Its just a part of life. I think a simple parkflyer is the go. I think building a supra would cost you about twice the price as one you could buy. www.modelflight.com.au/rc_model_electric_planes/koska_swing.htmmaybe something like this its $300. get a motor and esc from hobbycity and pull your gear out of that thermal thing that you have used once in 6 months ;D. Maybe a supra in about 10 to 15 years And go nuts |
|
|
|
Post by mikey100 on Jul 18, 2009 10:34:54 GMT 10
|
|
|
|
Post by chamm37 on Jul 18, 2009 11:44:28 GMT 10
Ok thanks Jeff ;D Really appreciate all the effort guys. The main thing i am having a problem with is actually building the bow. I have looked on rcgroups and all that but i can't get my head around it. Would i be able to arrange with someone to have a look at an actual bow so i can get some pics and some in my hands info ;D
|
|
|
|
Post by jase on Jul 18, 2009 15:40:56 GMT 10
chamm. the best thing you can do is jump in and have a go. everyone you ask will tell u a different way of doing it.
if cutting tapered wings like i have done you can simply tie 1 end of the wire off at the end of a table and with a piece of scrap wood. tie the other end around and hold on to your set. with this a car or motorbike battery set to the side. i used 16guage electrical wire to connect the battery terminals to the cutting wire. the cutting wire was 20lb ni chrome 0.6mm. as for temperature control i merely adjusted the length the wires were apart from each other on the cutting wire. it cut the 23" wing cores out no problem. thats 25" of heated wire. the closest i went when cutting out the horizontal and tail stab was 18inches. any closer and it was too hot. only put it closer to cut the foam into the size i wanted off the block.
if you have a look at my Jart Build thread you can see how simple i have the whole system setup. i was a complete Noob when i started this thread and look what i have achieved now.
as for bows. i saw somewhere, someone used a piece of dowel and bent like a bow (bow and arrow set) or find yourself a cheap childrens bow from cash converters and use that.
my setup cost me the wire ($3.95), everything else i had laying around the house.
|
|
|
|
Post by chamm37 on Jul 18, 2009 19:53:42 GMT 10
ok thanks for that Jase. I will be going to my grandfathers place next weekend so thats when i will give it a go and see how i go ;D Thanks alot guys...
Regards,
Chris
|
|
|
|
Post by sean on Jul 23, 2009 0:33:53 GMT 10
I cut some cores today... thought I'd share some pics of my setup. Below is my newer bow. Simple and light it works very well. It'll only cut a max 450mm core. I was having trouble cutting the 60psi blue foam with a longer bow (wire resonance problems) and this short bow completely cured my blue foam woes. A simple light bow is good - the arms are 5/16" music wire bought from my local hobby shop. The arms are compressed prior to stringing the cutting wire which provides plenty of tension in the wire. The bow is pulled by a gravity powered drop-bar (see next pic). The bow has a wheel that runs along a track made by taping a spare carbon rod to the bench. The track is angled to guide the bow during the cut. The angle of the track must be carefully adjusted depending on the planform of the core I'm cutting. I found without this track to guide the bow, the bow would move sidways unpredictably, often running into the side of the core halfway through the cut, ruining the core. You can just see a counter-balance lever on the bow (top middle of pic) - that was added to reduce the weight of the wire as it runs along the templates while cutting. This was to reduce a slight wire skipping problem I was getting from templates made with circuit-board material, but since switching to Formica templates (which are much smoother) that counter-balance almost certainly isn't needed.  Below is my drop-bar. It uses gravity to pull the bow while cutting a core. This allows reliable cutting of tapered cores - the wire at the tip is pulled through slower than the root. The difference in speed can be varied to match the taper-ratio of your core - the difference in speed depends on where you attach the pull cords onto the drop-bar. The allows smooth and even hands-free cutting.  This is how I block-out the foam (cut the foam to the required planform). These bolt to the bench and guide the bow to make sure the block is cut nice and square. The Phil Barnes block-out technique (using gravity alone) just doesn't work for me - when I try that method I get wonky cuts.  Ready to start blocking out the cores. This shows my original weapons-grade long bow which is way too heavy and complicated (it's a good idea for your bow to be light and balanced left to right or one side will drag more than the other on the template while cutting - this bow isn't). However it still works well for this purpose.  Ready to start cutting the profile. Lots of weight on top of the core. Position the wire on the templates ans sitting against the leading edge of the core and slide the core on the bench until there is equal tension on the root and tip pull cords. To start the cut, turn on the power supply, then all you have to do is watch and make sure the cut progresses smoothly. Be very careful there's nothing in the way of the bow as it cuts!!!  Close up of the tip template with the bow bow ready to start cutting. The templates are attached to the core with sharpened rivets. Formica templates are fantastic! Easy to make and you can get a very smooth cutting surface.  This is my power supply. It doubles as the charger for my winch battery (votage is variable from 0 to 15V).  A completed core. Very happy with the results - this shot shows my very first EPP core and it came out flawless. Quite a relief- EPP is very expensive and I didn't have any to spare.  Cutting the tip panels. These have a high taper so I tried the fixed pivot point technique. An advantage of this technique is you only need a root template. I had to revert to the old long bow for this cut. This pic shows the cut ready to commence.  This is the pivot point. It's simply formica with a slot cut into it for the wire to rest in. The formica is glued to a small block of wood which provides a firm base. The wire must sit at the same height as the centre-line of your core, otherwise you'll cut dihedral or anhedral into the core. High-tech tape job used to hold it in place on the bench...  The completed tip panel core. This pic shows the plasticky dags that I was getting on these EPP cores. They had to be sanded off.  Here's the resultant wing. I've gooped the panels together, still waiting for the goop to dry when this pic was taken. TE will need to be trimmed with a razor blade ready for the drag-spar to be attached.  |
|
|
|
Post by nick on Jul 23, 2009 5:40:25 GMT 10
;D
wow sean
that set up is fantastic
;D
|
|
|
|
Post by chamm37 on Jul 23, 2009 7:41:14 GMT 10
Thanks Sean for doing that mate ;D I am sure all of us guys are very grateful and appreciated that you did a step by step guide with PICTURES ;D ;D ;D
Thanks a lot. Really helped,
Chris
|
|
|
|
Post by thevon on Jul 23, 2009 8:57:39 GMT 10
Sean that's really excellent. Thanks for going to the trouble of posting a good description and pics - makes it a lot easier to work out what to do. Really nice lumps of lead you have there, by the way. The best thing for sanding those EPP dags off is another piece of cut EPP. Guys, if you're getting into this, make sure you read the article "How to make an automated foam wing core cutter" in the November 2008 version of RC Soaring Digest. Sean's cutter is modelled on those plans. You can find the article to download from Tailwind Gliders' website: www.tailwindgliders.com/Files.html#Articles |
|
|
|
Post by jase on Jul 23, 2009 9:31:51 GMT 10
|
|
|
|
Post by thevon on Jul 23, 2009 10:12:56 GMT 10
I enquired about buying a Tekoa Feathercut, but they quoted $157 USD for shipping! Makes it prohibitively expensive. And all the bits you need to make your own are very cheap and readily available.
|
|